
I don’t know about you but I’m always looking for the next painting project to try. Learning how to paint a butterfly has been on my to do list for some time now.
Plus it looks like a super easy project to knock out!
Butterflies make a really great subject for a beginner painting. They are colorful, making them fun to paint, yet simple enough to draw out quickly.
Their simplicity makes this a must-do project for any beginner painter out there!
For this painting, we will be looking to find a simple picture of a butterfly for our reference. One that has a background that we can make a bit obscure with the butterfly clearly displayed in an easy to draw way.
I don’t know about you but I feel a lot better when I actually finish a painting of something new I have never tried. I have certainly had my moments where I tried to paint something I wasn’t ready for yet and couldn’t finish it.
That’s why I think it’s important to be sure to choose something that looks easy for you to do at your current skill level.
In an effort to avoid driving you away with a bunch of preamble let’s just get right into it.
Collect References To Use
As a beginner painter myself, I’m always looking to expand my visual library by painting things I have never painted before. I do this with drawing too!
We must constantly be exercising our library of images we have stored up!
This way, one day we might be able to create things from our imagination at will.
Just look at how artist Greg Simkins is able to create these awesome surrealist paintings!
There of course are many other examples of this skill at work.
The first step in drawing or painting something you have never done before is of course to gather up some references.
Taking real-world reference pictures is always ideal but not always possible.
Though I have thought it would be fun to create a “hit list” of things to get pictures of what I want to paint. Sort of like when you get a list of things to collect in a video game for a mission.
Until you create that sort of a mission for yourself, the next best thing to use is Pinterest. It’s basically where I always go first.
I always start by creating a board for the subject I want to paint. If you want to check out my “Butterfly Painting” Pinterest board click here!
I would encourage you to get used to creating your own. This way when you want to paint something new that I haven’t created steps for, you will know how to figure out your own way!
The idea though is to collect 20 to 30 images. Half of the images should be cool photographs of the subject you want to paint while the other half should be various artistic representations of that subject.
This way you can see a variety of style options you may want to give a try as well as different photographic perspectives.
I find this is a great place to start any new project.
Then sometimes afterward I might take a look on Instagram to see what other artists are doing. That is rare though.
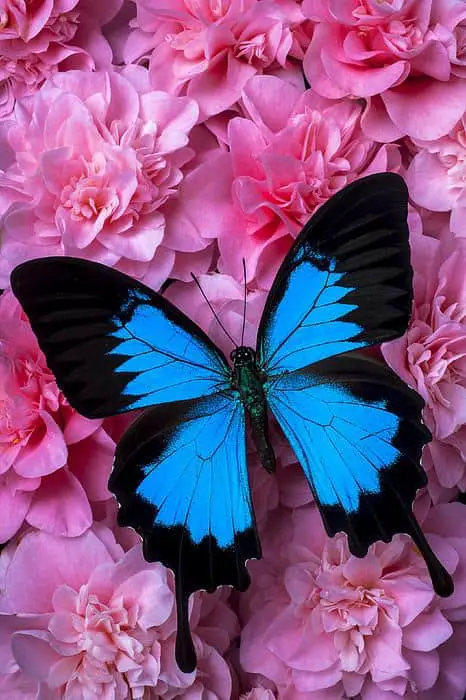
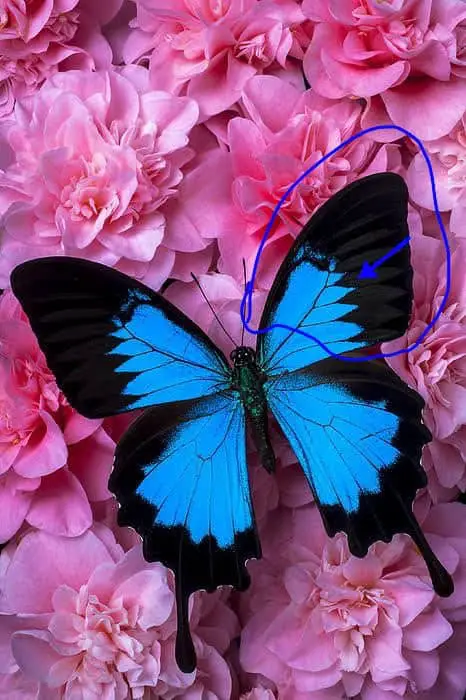
For this project, I have chosen this Blue Butterfly resting on a Pink Camilla by Garry Gay on FineArtAmerica.
As for the style of painting I was going for, there were a few basic types I gathered up. I’m going for something with a more obscure abstract background but a clean and clear butterfly in the foreground.
Draw Some Thumbnails and Sketch To Canvas
Next, let’s start building up our confidence with some quick sketches of the potential reference pictures we have to choose from.
This step is helpful for a number of reasons but one of them is to help narrow down your references. Sometimes I have a few good ones that make it hard to decide which one to go with.
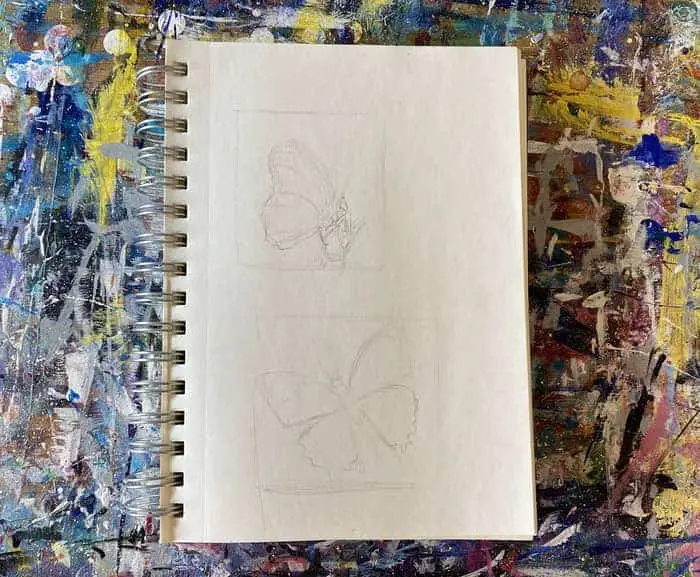
I know my above example picture of my sketches here is a bit light but if you look closely you can see these are two different butterflies.
The top one is sort of a side profile of a butterfly resting on a flower. This one was appealing because it was basically just one simple shape for the wings.
Let’s be honest here, when it comes to painting a butterfly, it’s all about the wings! Plus, we are looking for an easy to do option so I had to consider it.
I ultimately decided to go with the other second reference because I liked the brilliance of the blue wings juxtaposed against the pink background.
We may need to do the other one too in a different step by step!
Thumbnailing is something I just started working into my process in the last step by step I did, How To Paint a Rose. It is the practice of making small and quick sketches of your subject to help you figure out various elements of it.
It also helps to build your confidence to put a sketch down on your canvas. Once you have got some different quick sketches in and know how you want to paint your butterfly, draw a very light sketch on your canvas.
Keep it as light as you reasonably can for two reasons. One is because we are going to paint over it and don’t want our pencil parks showing through the paint.
Two is because if you make any mistakes with how you draw it out, it is easier to correct them if you have a very light sketch down.
When I was starting this particular painting I wasn’t expecting to do the step by step on it so I forgot to get a good picture of how I had it sketched out on the canvas but I begin to figure out it isn’t quite right later on.
I didn’t really notice it until I started painting the butterfly. I had the angle of the butterfly a bit off which I then attempted to correct as I painted the butterfly on.
This made things more difficult than they needed to be if I had noticed the angle and corrected it before I started painting.
So just keep all this in mind while you sketch out your butterfly on your canvas. Hopefully, you can avoid my mistakes by catching any you made a bit earlier.
That said, recently I have been watching some of the videos of Greg Simkins at work and I have seen him actually need to draw over areas where he began to paint something in but didn’t get it right so you could also do that as well.
Gather Up Your Paints, Brushes, and Canvas
Now, let’s discuss choosing paints and gathering your needed materials.
First off, the materials I am using may be different than what you have available or what you might decide to use if you chose to go with your own reference pictures.
That said, lets dive into my materials here first so if you are following along with me and my reference you can get what you have gathered up.
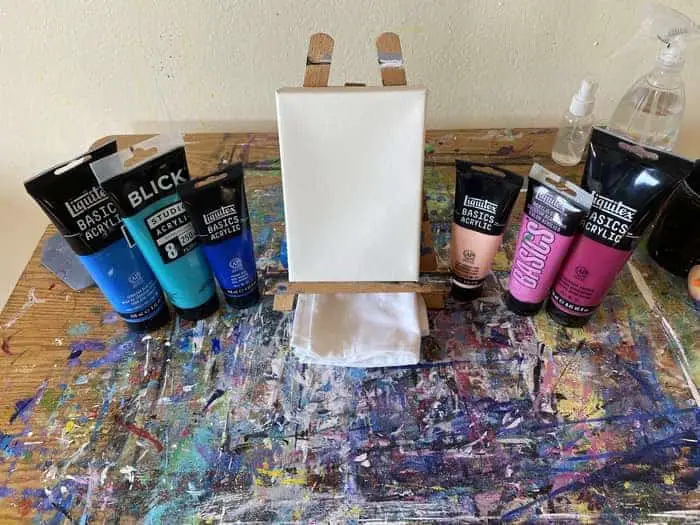
For this painting, I will be using a 5″ x 7″ gallery profile size canvas. These are the thicker canvasses you can get from DickBlick here.
Since in the reference picture I’m using my background are these pink flowers I’m just going to go for a more obscure and abstract pink background.
So for the background I’m going to be using the colors:
- Quinacridone Magenta
- Medium Magenta
- Light Portrait Pink
Then for the butterfly, I have collected a couple of blues and a green. To be more specific the butterfly is comprised of:
- Primary Blue
- Cerulean Blue
- Bright Aqua Green
- Ivory Black
As always, there may be other colors that find their way in to the mix as needed but this is what I think I will need today.
If you are using a different reference picture than mine do your best to select the colors you think you will need to complete the project.
If you are following along with me but don’t have some of these colors just try and select the ones you have that are the closest to this list.
With practice we will both get better at choosing the right color palette to use. Knowing how to mix colors and the role of values in an image goes a long way towards improving our palette selections as well.
Many artists like to work with limited palettes where they have to make an image out of just a handful of colors. You could even do a monochromatic painting where you are using different shades of one color!
The options are endless to the artist who achieves mastery.
Paint Your Background Pink
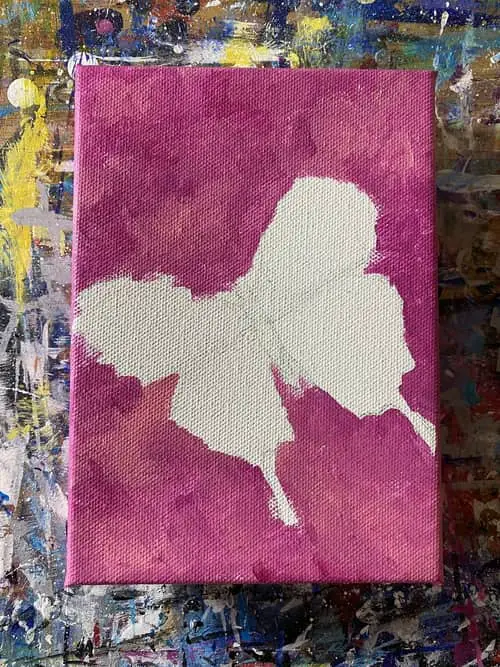
Now we start our painting by painting in a pink background.
To be more specific, I used primarily Medium Magenta with dabs of Light Portrait Pink. Nothing too specific here other than trying to vary the coloring a bit between your lights and darks.
I sprinkled in a bit of the Quinacridone Magenta as well but not that much. Just a little here and there.
We may decide to add in more details in later steps but for right now we are just are going for something a bit more obscure and abstract.
This is where it helps to have some idea of where your butterfly is going to go by having it sketched out onto the canvas lightly.
Up until recently I rarely ever did this as I’m used to working in the abstract. When working abstractly I very often go with the flow and will end up needing to paint over something when I decide what to add later.
You could potentially do this with the butterfly too if you wanted to paint the whole canvas pink first and then just paint in your butterfly without drawing it. You could also draw on top of the dried pink background as well before you start painting your butterfly too!
I guess it’s just a matter of how you want to work and how you feel about using your paint like that. I’m sure some will see painting pieces of their canvas that they know they are going to paint as something else as a waste.
There are a few different ways to approach laying out your subject matter but if you choose to draw it out, it is more like working on a coloring book with paint.
It can help expedite the painting process to have a decent sketch to paint over. Plus sometimes it is just easier to draw in certain details in the right proportions using a pencil.
In this butterfly painting, I ended up deciding after I had painted the background in that I didn’t like the angle of the butterfly that I had drawn on the canvas though.
This caused some challenges in the next step for me.
Related Articles:
- How to Paint a Cactus in 8 Easy to Follow Steps!
- How To Paint a Rose Abstract Style (Easy Step by Step)
- How To Paint A Galaxy (Easy Step By Step Guide)
- How To Paint A Moon Suspended In Space In 8 Easy Steps
- How to Paint A City Skyline (Textured and Abstract Style!)
Paint In Your Butterfly Using Blue and Aqua Green
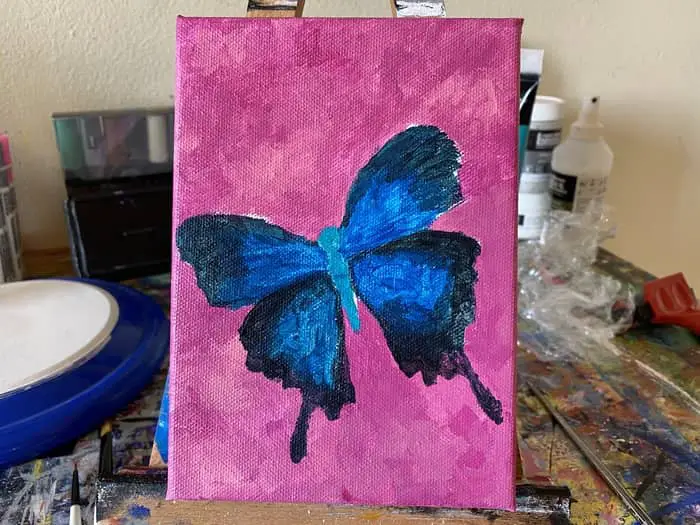
Now, start painting your butterfly in.
Starting with the body, use aqua green as the base layer for the body. If you drew your butterfly in all you have to do is fill in your drawing.
As I mentioned before, once I started painting I immediately felt like the angle of my butterfly was off.
So I began by attempting to paint the body of the butterfly at the correct angle.
This made painting in the wings more difficult as I had a sketch there but I basically had to ignore the sketch to try to adjust the wings to the new angle as well.
This is where a sketch on the canvas can be problematic. If there is something about it you need to correct you are better of doing that in the sketching phase if you can catch it then.
When the sketch is off, like it was for me in this case, it can become quite distracting towards getting the desired outcome.
Of course, once I went through this, I then just happened to watch a Greg Simkins video where he made some corrections by drawing on top of his painting. This totally slipped my mind as an option at the time!
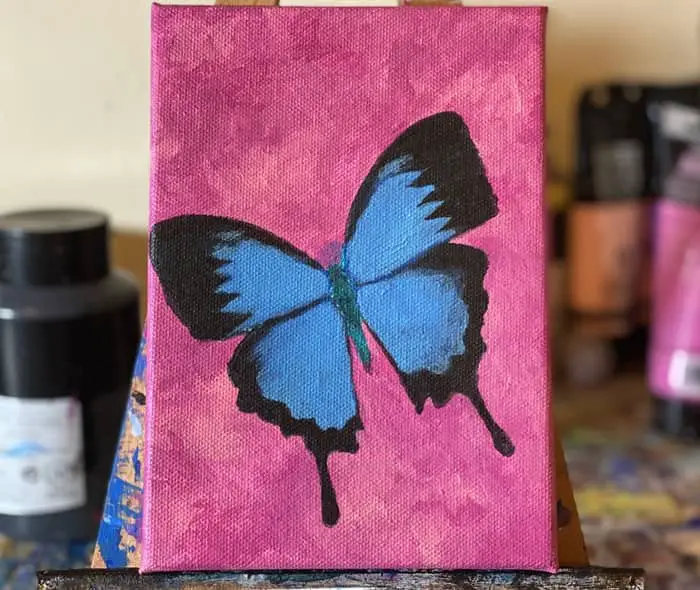
Anyways, for the wings, the Cerulean Blue and the Ivory Black can be used to get the color variations we need for a base layer. Mix the black and blue paint to make a dark blue for the edges of the wings.
This is just to lay them out and get a base layer down.
We will paint them dark black later once we get some of our blends and details more refined.
Now that we have the basic shape of the butterfly down I just need to make some adjustments to balance it out.
There is still something not quite right about it and I think it is the left wing. Specifically the droplet like shape coming off of the bottom edge of the wing.
Take some time to make some judgments on your progress so far. If you know something isn’t right but are having a hard time putting your finger on it, take a break for a bit and come back with fresh eyes.
In the next few steps, we will be fixing the issues and adding in many more details!
Fix Mistakes and Paint In Wings Further
For this step, I had to work on fixing the parts of the wings that were really bothering me. While I still feel it is slightly off in some ways this is much more satisfactory than it was before.
Here you can see the before and after pictures so you can better see the changes that were made.
On the left, you can see how the wings aren’t quite symmetrical. Especially the droopy part towards the bottom. So I painted over both of them with the pink background.
The wing on the right I painted over more as it seemed a bit too big.
So if you have any glaring issues like these this is the step to fix them in! As we go forward we will add more of the veins and other details.
Don’t be afraid to paint over parts and redo them if you need to. I had to greatly resist the urge to paint over the whole thing and redo it. In the end, expediency won out and I decided I was being too nit-picky.
Next we need to work on darkening up the rest of our wings. We still have some canvas showing through and we need to solidify our butterfly into place.
Once I had the bottom part of the wings corrected then I worked on painting the blue area in further using cerulean blue.
If you’re not following me along exactly with this reference picture just follow along by darkening up the wings on your butterfly as needed. Especially where there is any canvas showing through.
Sometimes you have to be strategic in how you apply your paint to get the stark effects we are looking for. This is why we added the blue first.
If you are following this reference, next, move on to darkening the black border around the outside of the wings. Focusing on extending the tops of the wings up a bit further to make that top arc just slightly steeper.
Now when we go over our edges around the border of the wings, since we already added our blue layer the black helps make some nice sharp lines using a flat headed paint brush.
After that begin adding in the four triangles we see pointing inward illustrated here in the reference picture.
This whole area I’ve outlined is the area we are focused on darkening and sharpening the colors in.
Next, we will focus on brightening up our blue further and adding in some of those wing structures. I’m not sure if they are veins or something else that supports the structure of the wings but it’s a detail I want!
We also need to work on the body and head of the butterfly as well. I was considering using a bit of iridescent medium to try and get some of that reflective effect on the body but haven’t decided just yet.
It’s not really needed but might be fun to try.
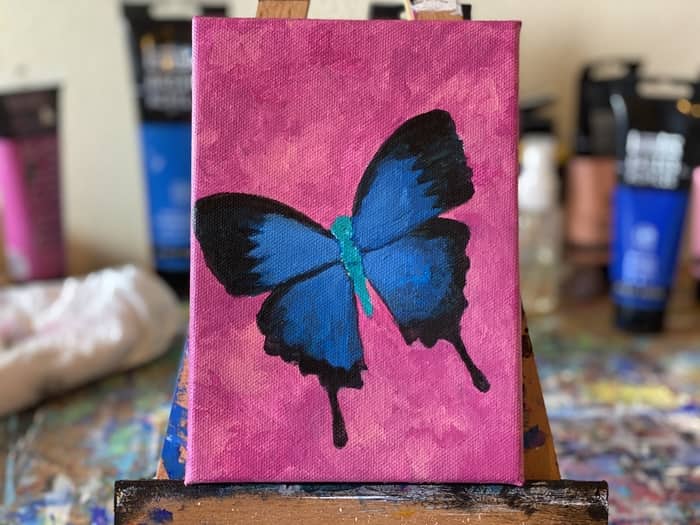
Paint One More Layer of Blue and Black On The Wings
At this stage we are getting close to the end. Just a few things left to do to finish out this painting.
In this step, add one more layer of color to your wings. Now that we have made all the necessary adjustments to the design we just need to adjust the colors.
Brighten up the blue area first by mixing a tiny dab of cerulean blue with light blue permanent. Go heavier on the light blue permanent to help brighten it up the area a bit.
One thing that is important to note that I neglected to mention earlier is the edge of the blue area should run nearly parallel to the edge of the black area.
The curves should match up with each other as this illustrates the curvature of the wings. They are slightly floppy with some curves and folds in them.
So just take your time and do your best to make them match. They don’t have to be perfect just a close approximation will do the trick.
Then lightly add some watered down black to the body of the butterfly. When I say lightly I mean very lightly. We can always add more in the next step.
The body of the butterfly is more of a green black so we aren’t trying to cover up our aqua green so much as darken it up a bit.
That’s pretty much all there was to this step. That and painting over the head of the butterfly so I can paint a better one in the next step.
I felt what I had there was just too big.
In the next step, we will bring it home by adding the smallest of details to make it pop!
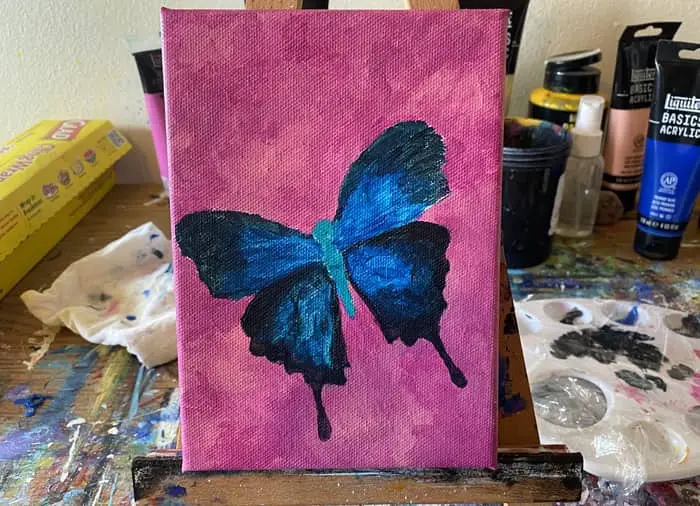
Paint In Wing Structures, Head, and Antenna

In the last step here we are looking to add the smallest details in. First, we need to start by painting the edges of the wings a darker black.
Making it a bit sharper and less transparent in the areas where there were some adjustments made.
Once that is done the next step is to paint in the wing veins that run across the expanse of the wing.
The good news is that there are a number of points we can use to build our branching veins off of.
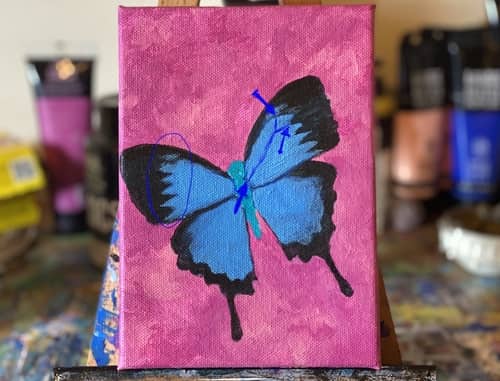
In the top half of the wings, the black triangles coming out on the inside of the black edge are all points where a vein passes through.
In the illustration above I have tried to point out the areas of interest to be focused on.
If you happen to be using your own reference look for some way to break it down in a similar way.
If you’re following along with me you’re basically looking to use these points to paint small thin lines. I found that adding a bit of water to the paint helps for it to flow.
Another thing to consider is to make sure not to load up too much pigment on your brush at once as that will end up creating a fatter line than what we want.
If you have that happen thoroughly wash your brush off, then dry it off but leave it a bit damp. Then you can go over it and actually remove the paint.
Especially if you do it right after making the mistake. It’s either that or paint over it and try again.
Just know there are options if something happens you don’t like.
Once we get the top half completed next we move on down to the bottom half.
Again, there are points of interest to help us guide where to put our wing veins.
In the bottom half of the wings we are looking for the inward curves pointed out and circled here.
These wave peaks on the inside of the wing are where each vein is coming out from.
I brought those out one at a time from the inside of the wing closes to the body. This way I could build out the vein that they all connect to that loops around one piece at a time.
If you just focus on one small piece at a time building it up like a puzzle before you know it the wings will be completed!
Then, once that is taken care of, we need to darken the body of the butterfly and add the head.
I basically just added black to the bottom half and the sides as well as brushing it lightly over the rest of the body to make it a bit darker.
Then add the head with a couple of antennas.
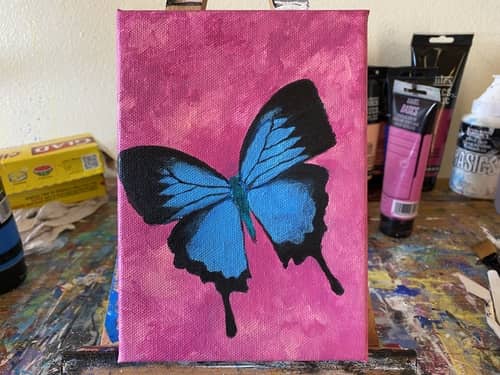
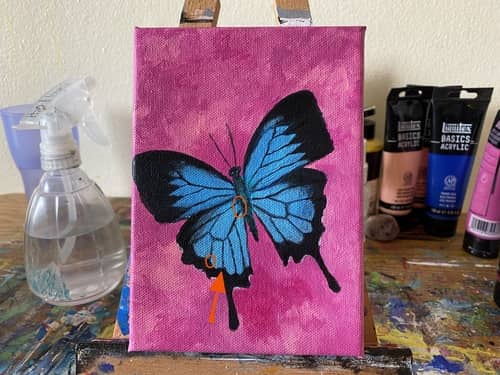
Finally, the last little details to add is a bit of white highlights. If you look closely there are a couple of tiny white reflections coming off the butterfly’s head as well as some white edges to the bottom half of the wing.
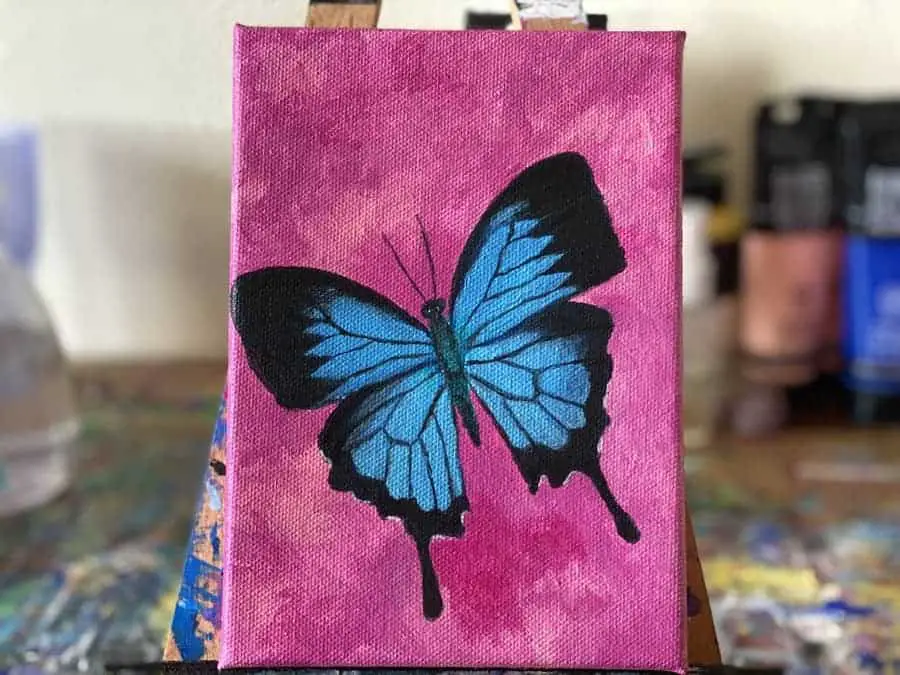
Very carefully add them in and then the painting is complete!
Well done! Sign it, date it, and hang it!
If you found this step by step helpful and would like to share your results with me just tag me on Instagram using LearningArtWithMarc_. You can also click here to hop over and follow my profile.
