
When I first started this website I had just started painting. One of the first types of paintings I ever did was a galaxy painting. It is a very easy project for any beginner to try.
As a result, one of my very first posts on this site was Easy Galaxy Painting for Beginners. You should go check that out for some of the beginner tricks I used to use.
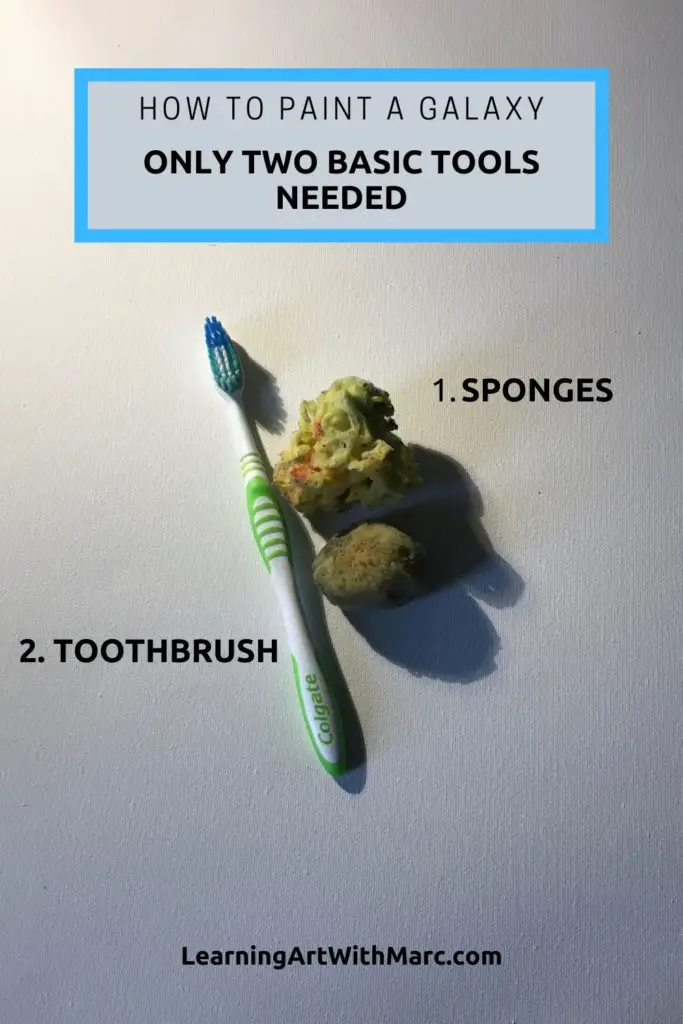
It recommends using tools like sponges and toothbrushes to get started with your first galaxy painting.
It’s been some time and I have done a number of galaxy paintings since then so I figured it was time to make a new step by step to demonstrate some of the newer techniques I have learned along the way.
I rarely use the sponge and toothbrush method these days but it is still a great place to start.
The cool thing about galaxy paintings is once you learn how to do even a basic one you can then use these same techniques to paint a galaxy background.
The galaxy itself makes for a great standalone subject but it never hurts to put some planets or spaceships in the foreground. Either that or maybe a mountain below a starry night’s sky.
There are a lot of ways to build on top of it and use these skills for other things.
Find Some Galaxy Pictures to Use For Inspiration
The first place to start with any project is to get some visual references for inspiration. This goes double for any subject matter you have never made before.
It is important to build up your visual library and exercise your observational skills. It’s more difficult to make something that looks good if you’ve never seen what good images of that subject look like.
This is something it seems many artists omit from their steps but it is something I do for nearly every project I take on.
For this project, I created this Pinterest board for Painting A Galaxy that you can find here. When looking for references and making your own collection of inspirations be sure to collect examples of both the artwork of that subject and actual pictures of that subject.
One skill we are trying to work on building here is the use of multiple reference pictures for one piece of artwork. This way we get used to drawing elements from multiple sources in order to create something new.
“Creativity is putting together known elements in unique ways.”
Jacque Fresco
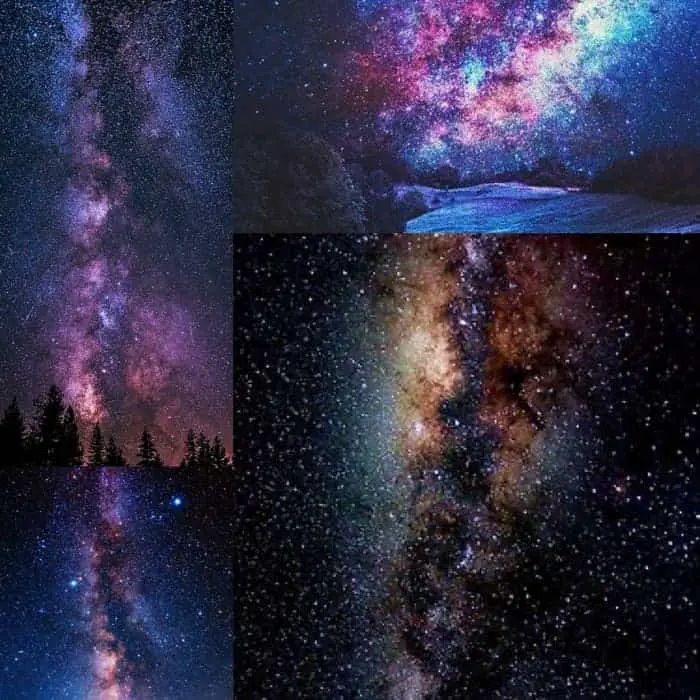
For this particular project, we are focused mainly on creating the sort of galaxy painting that looks like a starry night sky.
So I gathered two references of pictures that have some sort of landscape under a starry night sky and two references of the sort of milky way like galaxies we are looking to create.
While we aren’t going to be creating a landscape foreground today it is good for you to see where this simple step by step can take you to once you have this part of it down.
Let’s figure out what we need to start.
Imagine Painting A Galaxy and What You Will Need
In nearly every painting I do, especially ones with subjects I have never done before, I’m basically making an educated guess on what colors I will need for it.
It is sort of the same thing with the brushes as well. I grab what it is that I think I will need and/or want to use.
Sometimes I have to imagine the steps I’m going to take to complete the painting or how I might explain it to you to figure it out.
So if you are using a different collage of references, which I would encourage you to do, then before we even get to the steps I’m about to outline for you take a moment to imagine yourself making this painting.
How would you do it? What brushes would you use? What colors would you choose?
Then, once you have thought about it, get the colors you think you will need by choosing the colors you have closest to your references.
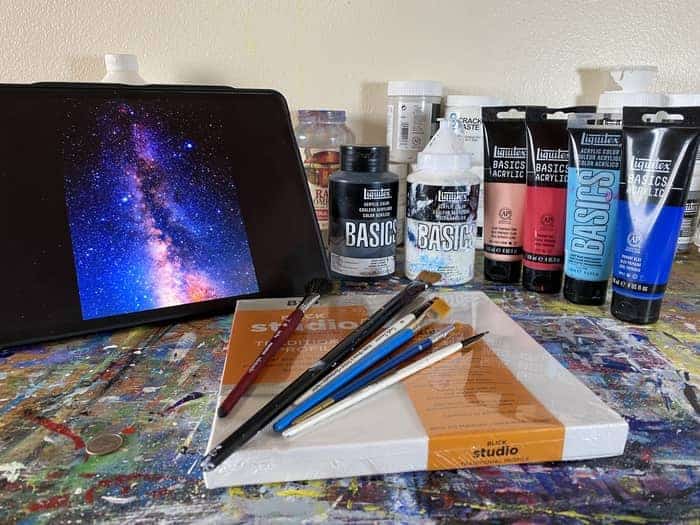
Just in case you would like to follow along with the colors and references I’m currently using the Liquitex paints that I have are:
- Ivory Black
- Titanium White
- Light Portrait Pink
- Primary Red
- Light Blue Permanent
- Primary Blue
These are the colors that I think I will be using. It’s possible I don’t use some or others to find their way into the mix.
As long as you have additional color options at your disposal, be open to any potential whims or inspirations that may drive you to include others.
As for the paintbrushes, I actually just got my first mop brushes recently and have been looking for a reason to use them. If you’re unfamiliar with them, they are these fluffy brushes that look like makeup brushes.
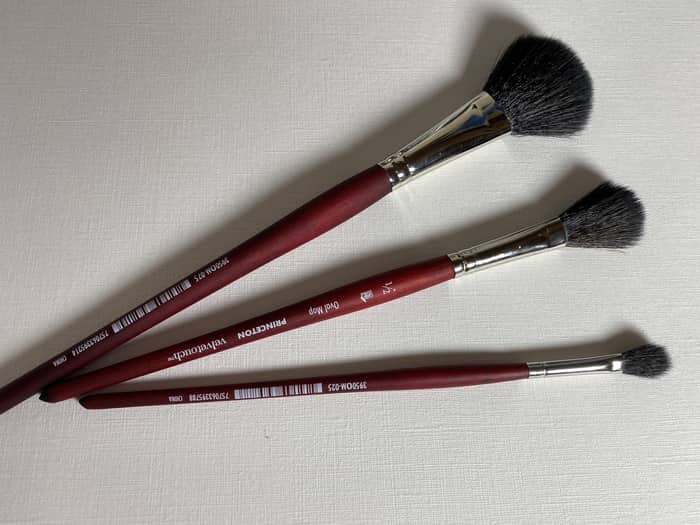
These are supposed to be great for getting soft blends so this is my first opportunity to try that with them. There are lots of soft blends to get in most galaxy paintings.
I will only be using the medium and small ones in this painting. The other brushes I have on hand are a large flat-headed brush. This will be used primarily for the first layers to apply a lot of paint at once.
This is actually when I plan to try the mop brushes too. That way if it comes out bad I can paint over it.
The other brushes I have are the smaller (5/8) flat-headed brush, a blender brush, and a few small pointed brushes for details.
As for the canvas, I’ll be going with an 8″ x 8″ DickBlick Studio canvas.
Lately, I have been getting all of my supplies from DickBlick. If you’re interested in getting something you see in my collection for yourself check out their website here!
The entire site is like the painters isle of the hobby store!
Use the promo code CFBJ for $5 off any order of more than $50! Plus free shipping on any order over $45!
Enough about the supplies though, let’s start painting!
Paint Your First Layer of Colors
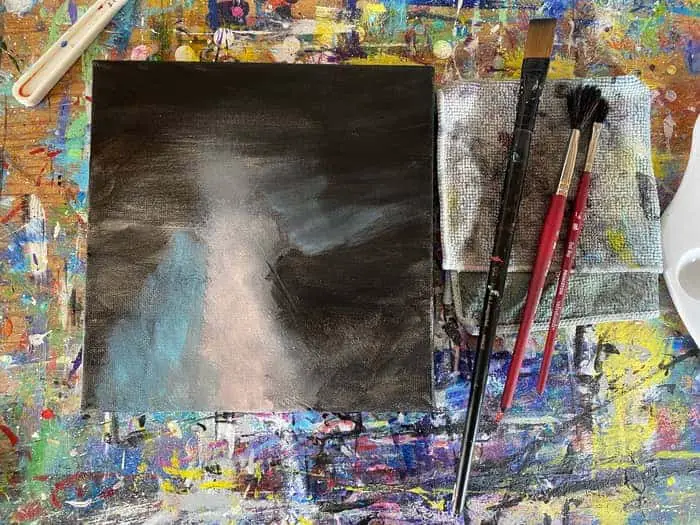
For this first layer, in most cases for a galaxy painting, we start by painting the canvas totally black.
I wanted to try something a bit different and try adding a bit of color on the first layers. Plus, this is the perfect time to try out the mop brushes.
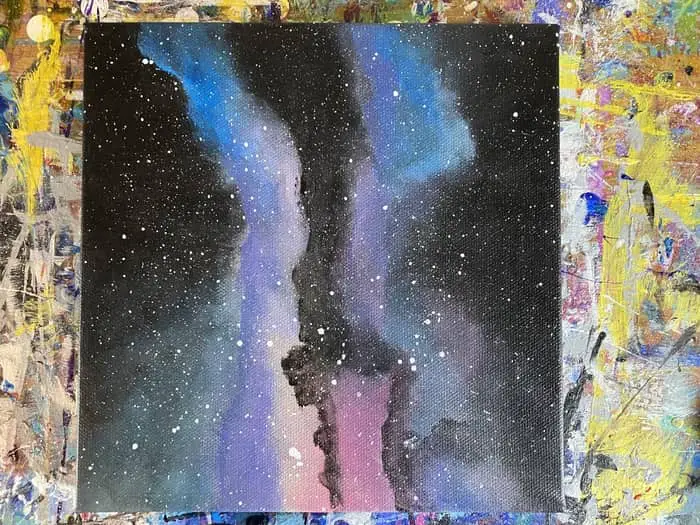
First, start at the top with black and then bring it down the canvas a bit. Then as we work our way towards the middle and bottom we start adding gin some colors gradually.
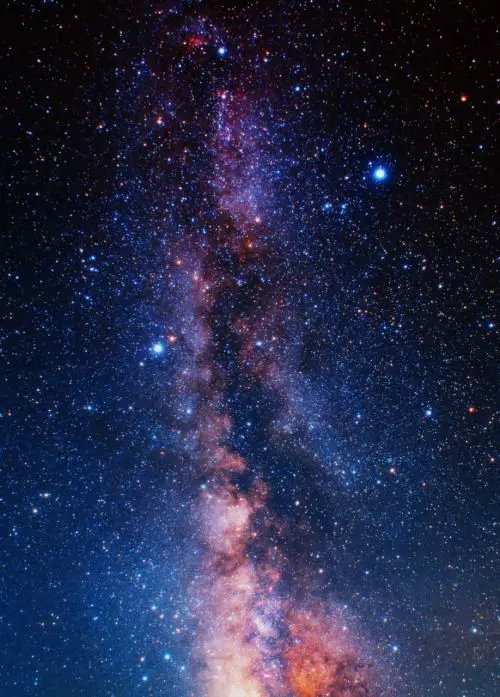
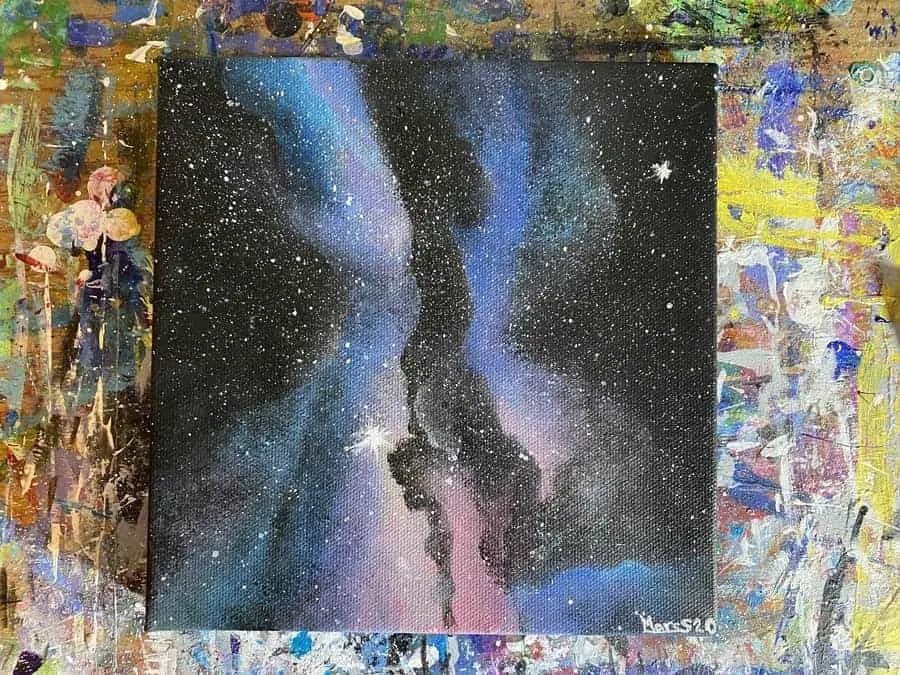
For every collage of references I make, there is usually one, in particular, I gravitate towards more than others. For this painting, the main picture I was pulling most of my inspiration from is this picture here.
It says on Pinterest it is originally by Mos-Photography on Getty images. I could not find it on Getty images but I want to make sure to give the original artist credit where credit is due.
So, following the picture, there is a light pink cloud running up the center of the image. Stemming out from the pink strip of light is a dull light blue glow.
This is a common sort of formation for a starry night sky and something good to use above a landscape.
This is where we want to start trying to get a blend of different colors and was when I tried out the mop brushes for the first time. If you have mop brushes now is the time to use them!
They are supposed to work well at getting a nice soft blend but I think perhaps I need my paint to be a bit more fluid for the brush to move it around the right way.
From the demonstrations of it I have seen you’re supposed to use it very lightly to spread the paint around. That didn’t really work too great for me so maybe I need to try something different in the next step.
If you don’t have a mop brush then a sponge will do just fine for this step.
To get a gassy effect with a sponge you need to get the sponge damp. Not wet now, damp. So squeeze as much of the water out as you can.
Then load the paint up on one small spot on the sponge. Now start dabbing it in the area you want your gas cloud. Then, where the paint is on too thick and saturated, turn the sponge to a side without paint and dab it out.
This will help thin out the pigments between pulling them out thicker and mixing in with the dampness in the sponge.
Either way works really. The sponge is probably easier to get a good blend with too.
Depending on how things go in the next step with the mop brush I may end up pulling out a sponge myself.
Use Your Mop Brush or Sponge to Create Gas Clouds
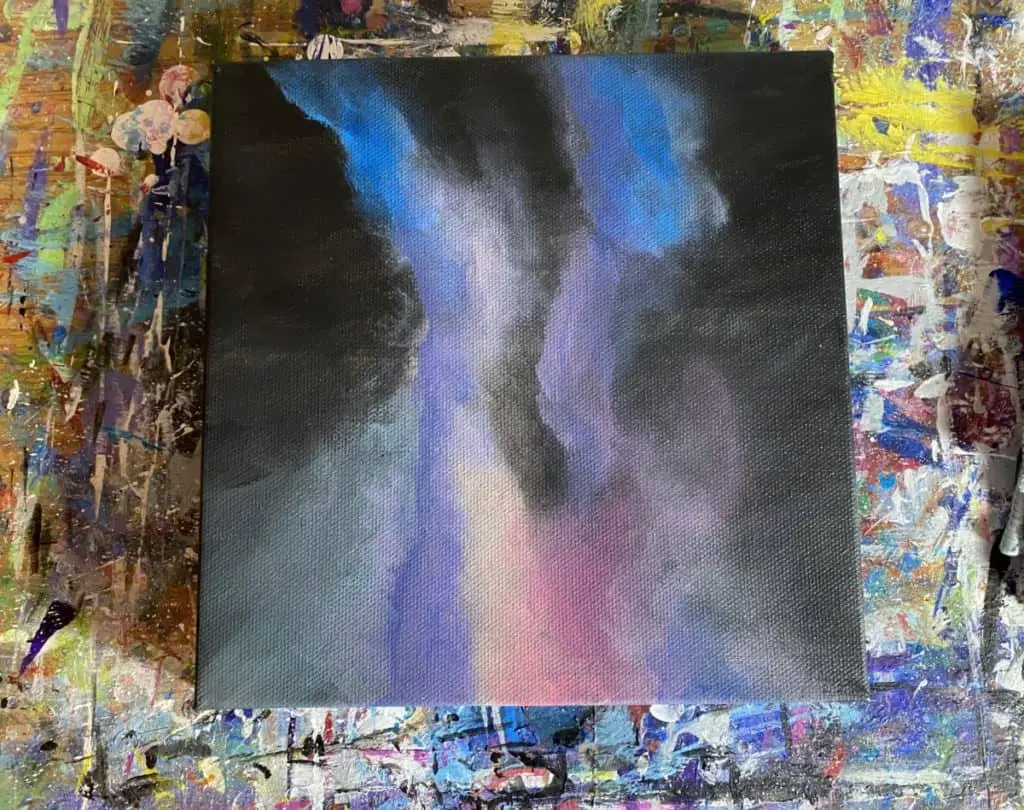
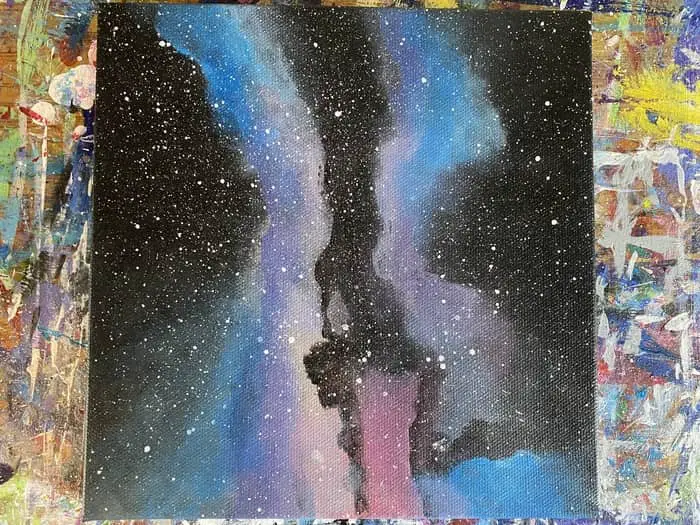
Now we really start to light up the sky with this step.
What we need to do now is to build out the gas clouds with more colors. If you’re using the sponge method it helps to go just a bit at a time. Really both methods require a gradual approach.
Building it up bit by bit with each layer. Especially with the previously described technique.
With the sponge, in particular, it can be easy to add too much to a spot and then when you try to dab it out it creates a sort of stamp mark rather than spreading in a thin cloud.
This is one reason to rotate the sponge to a clean side that is slightly damp. It helps to bring the blend out and not make a stamped mark of a particular spot on the sponge.
As for the mop brushes, this time I think I got a bit better result by using them. To use the mop brush, apply the paint with a flat headed brush to where you want your gas cloud to go.
I find it helps to add a bit of water to your paint. Just enough to make it a bit more fluid. It may even help to apply the paint a bit heavier.
Once you have it applied paint to the canvas where you want it, come in with your dry mop brush and work the paint out in circles. The softness of the brush bristles helps get a nice soft cloud-like look to it.
It does require actually putting some pressure on the brush though. Not a lot but enough for the soft bristles of the brush to pick up some paint and move it around.
The mop brush is definitely a useful tool to have for galaxy paintings. The blend you can get between two clouds of colors is much softer than what you can do with a sponge.
While sponges are useful and can get great results, they are not quite the same sort of softness you get with a mop brush.
You can create sharper edges to your clouds by creating an edge with the flat head brush when you put the paint on the canvas. Then just avoid that side with the mop brush and it will leave a nice sharp edge to the cloud.
There are other techniques we can use in later steps too to help bring more depth to these clouds. They’re the sort of things you do closer to the last steps of the painting.
We can’t stop now though! We need to make this painting stellar!
Make Sure Canvas is Covered and Add Stars
The first thing we need to do in this step is to make sure the canvas is completely covered.
My first few layers of paint were a bit thin and left quite a bit of the canvas showing through. Especially on the sides of the canvas.
So start by adding black paint to the edges where needed and then where there may be clouds of color be sure to bring those out around the edges of the canvas.
This, of course, is a personal preference of mine. I have seen other artists that prefer to make the outside edge of the canvas a solid color. I like to have my image wrap around the sides.
Since we are already going with the black paint, add in some darker spaces of black paint in your gas clouds where you want to make it look like the gas is more broken up. Creating a bit of deep space between clouds.
If you have a mop brush, use the dry brushing technique we have been using in the previous steps to get a soft blend. Apply the paint with a flat-headed square brush and then quickly come in with the mop brush to dry brush it out.
In places where you want a sharper dark edge on the cloud use the end of your square brush to deposit more paint where you want the edge then pull it out in the direction where you want a softer blend.
Once you do that come in with the mop brush and lightly brush it out working your way in closer to the sharp edge but don’t actually dry brush the part where you want the dark edge.
If you’re using a sponge, we would use the same technique as before where we load the black paint on one point of the sponge. Using that spot apply it to where you want the darkest spot and then work your way out from there to blend it outwards.
Next, add your first layer of stars. To do this it’s really just a matter of watering down your white paint a bit to make it more fluid so that it can be flicked off your brush.
If you have any trouble with this, an old toothbrush can work nicely since the bristles are a bit more stiff and will fling the paint better.
One caveat to that though is to let the excess wet paint drip off the toothbrush before you try to flick it. The last thing you want is a big white blob to fall of your brush and land on the canvas.
If you want to be prepared for that potential event have some paper towels handy. If that happens and you get it with some paper towels quickly enough it shouldn’t be a problem.
Plus, we have a few more layers of paint to go as well. This first layer of stars will help add depth as we build layers on top of them.
Related Articles:
- Easy Galaxy Painting For Beginners (My Original Galaxy How To)
- Painting Planets with Acrylics
- How To Paint A Moon Suspended In Space In 8 Easy Steps
- How To Paint Water (A Step by Step Guide)
- How To Paint Clouds: A Step By Step Exploration Of Cloud Painting
Paint More Gas Colors and Add More Stars
Now we continue to build the gas clouds and add more layers. Most of the steps in this painting are a bit rinse and repeat. It’s all about building it up a little bit at a time in layers.
If there were any black spots you added that you don’t like now is your chance to cover it up and pretend like it was never there.
At this point in the project, I began to combine two of my main references into one.
I felt these two pictures were so similar I ended up focusing on using both of them to draw inspiration from.
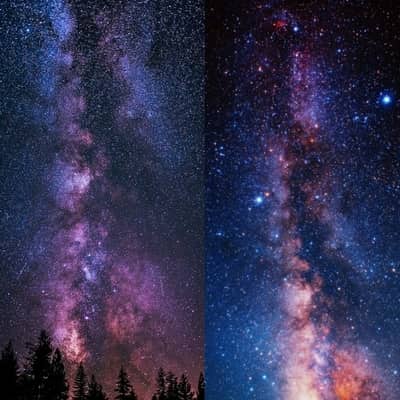
They both have a lot of stars visible as well as these multi-colored gas clouds.
Both have shades of light pink, purples, and blues.
It is likely these are both so similar because they are both pictures of our very own Milkyway.
I’m at least sure the picture on the left is as this picture was originally taken by photographer Michael Scott and is labeled as “Milkyway Over Yosemite. The one on the right is the one from earlier in step 3 where we first started painting.
I started off using the one on the right which is why I ended up with more light pink in the painting. Plus the overall blue tint as well which seems to permeate the picture on the right.
I of course have taken some artistic liberties at this point and would encourage you to do the same. I think that perhaps now you can see what I was talking about earlier.
If you’re looking to do a starry night landscape, the Milkyway formation you see in both of these pictures is a good way to make a galaxy background for it.
You could even follow what I’m doing in this step by step and then paint your foreground on top of it.
Add One More Layer of Colors
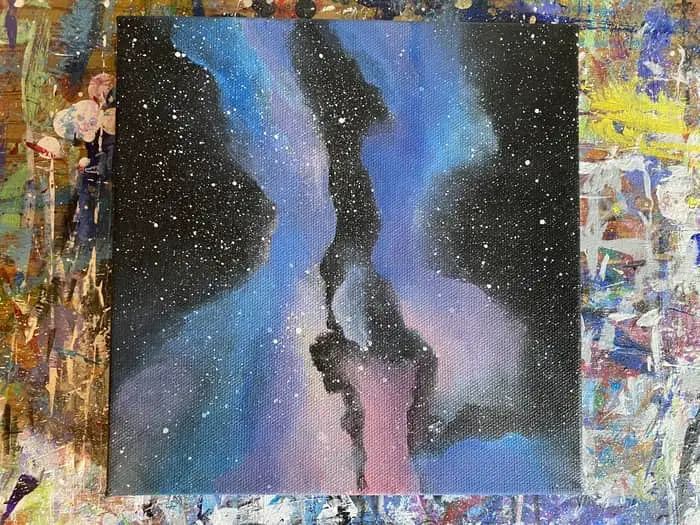
We have one more layer of colors to add to deepen the effects of the gas clouds.
While I continued to use my mop brush in this step, if you’re following along with what I have been doing I’d recommend switching to a sponge technique going forward.
If you look at the picture above you may be able to tell I’ve may have gone a bit too far with my mop brush. I got a little narrowly focused on using it.
I think in the next step I’m going to switch over to the sponge to see if I can get some of the texture and variation I have in my other galaxy paintings.
This painting is a good example of what I’m talking about.
The way the gas breaks up with the dark spots just like what we see in our reference pictures is due to the texture of the sponges used.
So if you’ve been working with just a sponge so far hopefully yours is looking more like this example here.
We will have to see if switching to the sponge in the next step can help me pull through and bring it home. I may need to add a few more layers to get it worked out but I’ll get it there one way or another.
It’s all about the layers!
Take a moment to take a break from your work and come back to it in a few minutes with fresh eyes. Be conscious of the things that bother you because the next step is the time to fix it!
Use A Sponge to Add Details and Hand Paint Stars In

This is the last step, if you’ve been following me along and have been using only the mop brushes so far we need to switch to the sponge.
Especially if your painting is looking as saturated as mine. We can use the sponge to help pull it back a bit.
Plus the texture of the sponge creates the effect that the gas is dispersed. Don’t forget to rotate the sponge as needed when you want to thin the paint out further.
Once you do this next we need to use the flicking technique to flick on some more stars. This time we want to be careful to get them where we want them the most as this is our last fling.
I try to focus on areas where there is a lot of light. This will be where there are concentrations and clusters of stars. That said, for a galaxy painting like this, the stars are all over the canvas.
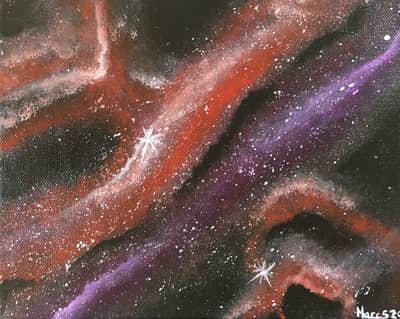
The last thing we need to do is take a bit of watered down white paint and a small pointed brush to paint in a couple of stars. Having it watered down will help for when you try to pull the paint out to get the shine of the star.
Be strategic about where you place these stars. Think about the rule of thirds and try to place them accordingly.
You can also look for the white dots that fell at random when you did your last flick and turn those into larger stars.
Once you have your stars painted then all you need to do is sign your work, seal it, and hang it!
