

Ever since I first started painting I have always wanted to do a series of cloud paintings. Simply just to practice painting them and understand how to get the different types of clouds that there are.
There is no better time than now to figure out how to paint clouds better!
I encourage you to join me in this exploration! I’m going to try to break this down into do-able steps no matter what your reference picture is.
My goal is to enable your creativity and give you the tools needed to create the images you want.
Even if that means showing you my embarrassing failures and moments of doubt along the way. Hopefully by doing so that will help give you the inspiration and strength to make it through your own frustrations.
You have to keep pushing through it to build that skill and get to a quality result.
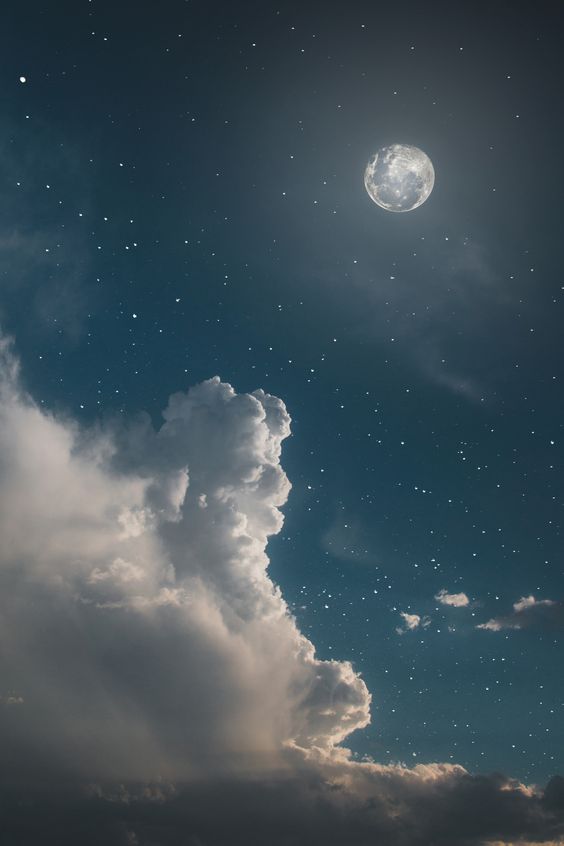
For this first exploration, we will be using this photo that I found on Pinterest here.
It originates from a Tumblr account called Chele Belle’s Lair. I can’t tell if this is the original photographer or if it is just someone who collects cool pictures of the moon.
Since the reference picture is darker and comprised mostly of the color blue I’m going to try and make this painting monochromatic.
I’m going to be using only primary blue, titanium white, and ivory black.
If you are using a different reference picture just do your best to choose the closest colors you have.
For our paintbrushes, we are going to use large flat brushes for our broader layers like the background and basic layout.
As we work our way down to the smaller details we will work our way down to smaller brushes. Sometimes it’s not so much a matter of the type of brush you are using but how you are using it.
There are many approaches to painting clouds. Keep reading to watch me mess up every one of them
Related Articles:
- How To Paint a Sunset in 8 Easy Steps (Beginner Acrylic Painting)
- How To Paint Water (A Step By Step Guide)
- How To Paint a Campfire With a Soft Glow
- How To Paint Bubbles (An Easy Acrylic Painting Project!)
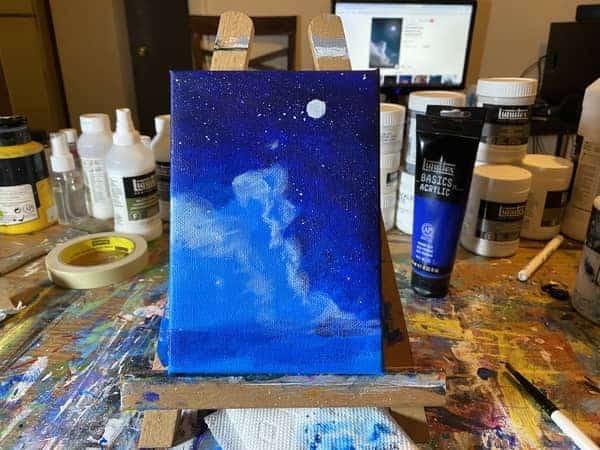
Paint Your Background
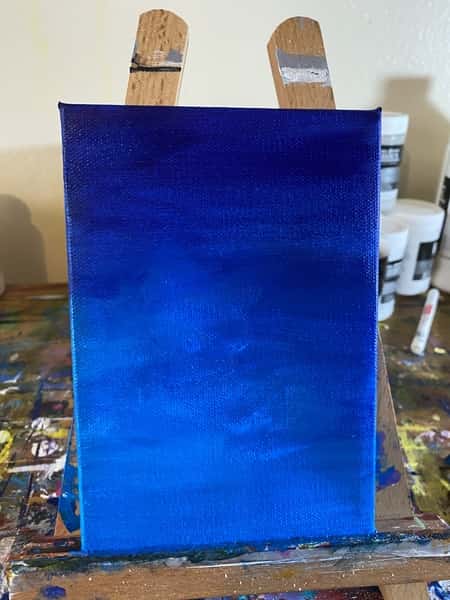
You will want to start by painting your background.
You’re looking to get a basic layout and gradient. As you can see from the picture above I tried to get the basic areas of dark and light between the background sky and where the clouds will ultimately go.
At first, I used just my primary blue and then I started to add a bit of titanium white to my blue as I got to the area where the clouds will be.
There’s nothing too special happening in this step. Other than this totally wicked awesome Instagram Reel I did over here on my Instagram account!
Go check it out here and follow me to keep up to date on what’s currently cooking in the Art With Marc lab!
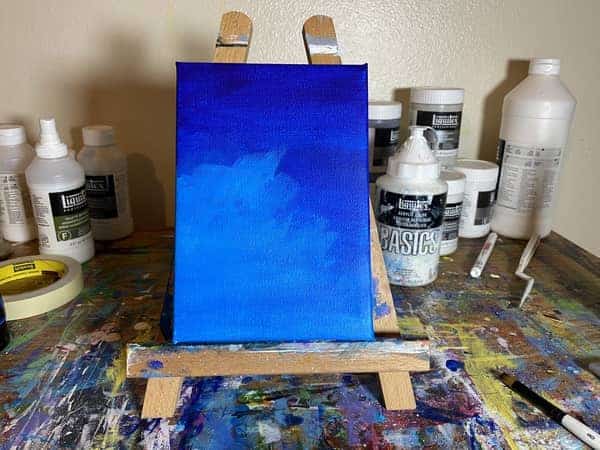
I used a large square brush to make it easier to apply more paint at once.
For the area with the clouds, I did start to move the brush in a bit of a circular motion towards the top puffy parts of the clouds but that’s about it. Just a little something to create that misty dispersed effect.
Just keep in mind for this layer we are just trying to lay things out. We will make the necessary adjustments as we go.
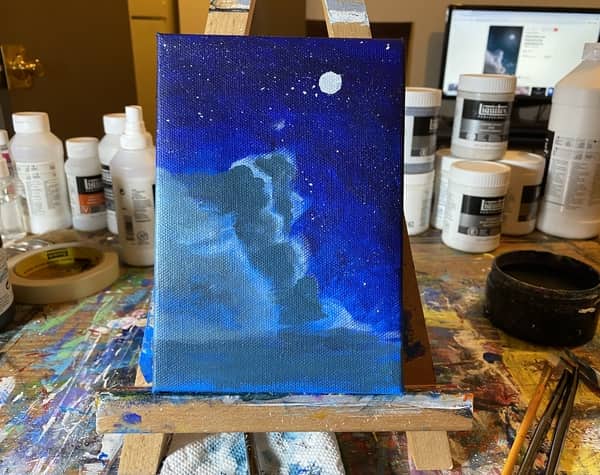
Darken Background Further and Outline Clouds
In this step, we want to adjust the colors as needed and start to define our clouds a bit further.
For me to get my painting a bit closer to the reference picture I needed to darken the background a bit further.
While I was making this painting, I was very invested in learning to document the process using Instagram’s new Reels feature so neglected to get good pictures for these steps.
I did have fun making those videos though! Check out this step’s video on my Instagram account here!
To darken the background I added a dab of black to my primary blue then added more blue as I worked my way down. I used this opportunity to make the outlines of the clouds just a bit better by darkening the sky behind them.
Next, we move on to trying to lightly outline our clouds. I tried to make a bluish grayish color which likely should have been a bit darker for this step.
Either way, it served its purpose. Lightly outline your clouds by dry brushing on your paint lightly in a circular motion or maybe even a dab.
I’m using a messy frayed brush with soft bristles. Using an old frayed brush to dry brush it on will help you to get that misty cloudlike softness to your clouds.
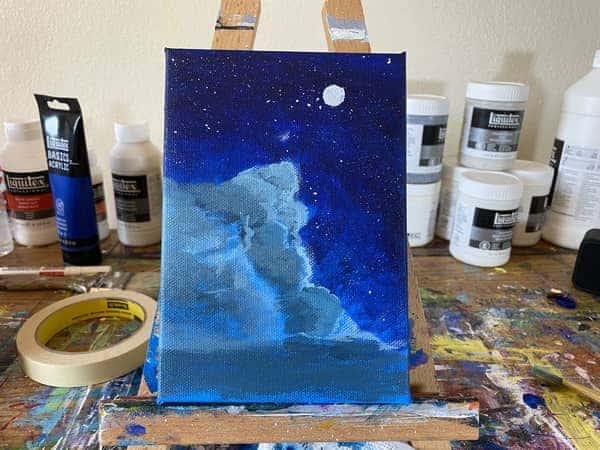
Add The Moon and Stars
Before we move on to adding more details to our clouds we need to add the moon and stars to the background.
Adding the moon is rather easy as you just simply need to paint a small circle. I took my blue-gray mixture from before and added more white to it.
In a later step we will add more gray spots and the smaller details that make it look more like the moon.
After I painted a small circle for the moon I then watered down my paint so I could flick some starts onto the canvas.
Check out the IG Reel demonstration here!
It took me a while to figure out how to do this with a regular paintbrush. The key is making sure the paint is fluid enough.
If you do have any trouble with a regular paintbrush you can always use a toothbrush to do this too. This is what I originally used to use when I first started painting and is a really great tool to help with this effect.
All we need to do is flick our stars on. Don’t worry too much about drops that land on the clouds as we will be painting over.
You could always hit them with a dry brush to fluff them out and make them look like part of the cloud too.
Either way works really as we can always make corrections in the next layers.
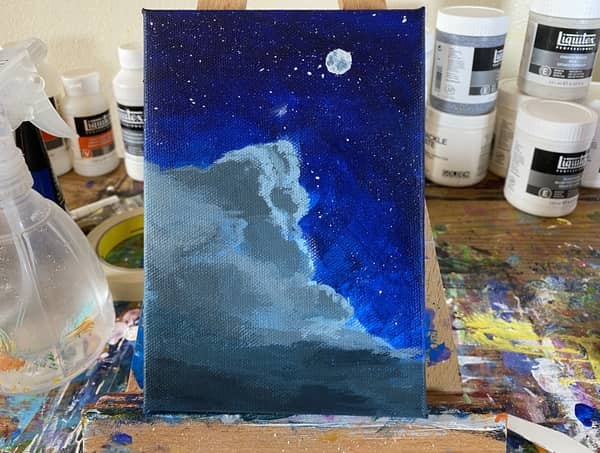
Add Darker Details To Your Clouds
The next thing we want to do is start working on the details of our clouds.
What we have done so far was just to help get the basic shape and layout of the clouds. Now we are going to fill them in with some of the darker tones we see and then work our way back up to the lighter colors.
I created a darker blue gray to use. If you want the more misty blended effect I would recommend dry brushing it on lightly.
Another technique to use, and this one likely would be better for the light mist effect we are going for, is to use a mop brush.
I actually don’t have any of these in my collection just yet but I just hopped over to Dickblick to buy some here while writing this! Perhaps you should hop over to that page and purchase some yourself if you have trouble getting soft blends as I do.
Having a few different sized mop brushes will go a long way towards helping us get the right effect a bit more easily.
For now, you can get a decent result with a bit a soft dry brush sweeping very lightly and gently in circular motions.
If you don’t have that sort of a soft brush an old frayed brush can work too.
This might seem contradictory but it’s even helpful to get the brush slightly damp, then wipe it off on a towel before going back to the canvas and using it to spread the pigments around a bit further.
You have to be careful with this technique because if your brush is too wet it’s going to pull the paint right off the canvas and make it look messy.
Either way, I encourage experimentation! Trial and error is how I have figured out what works for me!
All that aside, in this step we are focused on laying down the darker undertones of the clouds and we will gradually build up on top of that as we go!
As you can see there are parts in the picture where I feel I got the softness I was going for but there there are parts where I applied the paint a little too dark and heavy.
We are going to try to fix this and several other things in the next steps.
Keep Adding More Layers!
With nearly every painting I do, especially ones that present new challenges for me, it goes through an ugly duckling phase.
I hit a point where I question what I am doing and feel a certain sense of frustration that it doesn’t look like how I think it should look.
I literally want to break my paint brush in half and set the painting on FIRE!
Do you ever feel that way too?
Good! That’s normal my friend.
Push through it! Put that lighter down, take a deep breath, and add more layers!
When I started to encounter trouble with this I went to see what I could dig up that might help out. Ryan O’Rourke over on the Stay Creative YouTube channel has some landscape tutorials that have clouds in them.
If you’re having any trouble it might help to check out some of the parts of this video where he is working on his clouds. It should start right at a point where he is about to start adding highlights to the edges of one of his clouds of you click below.
The clouds he is demonstrating here have a bit of that fluff and misty effect that I want in mine.
Here we see him applying his highlight heavily and wet on the edge, then working quickly to add his darker color so he can blend them together.
I think this is where I’m going wrong. I need to try this wet on wet blend technique.
There is always a way to make it work!
Ryan is a big advocate of what I’m talking about here too. He talks a lot about how some paintings just don’t look good until you get to a certain point in the painting and you just have to keep adding more layers until you get there!
Try the Wet On Wet Blending Technique
If you watched the video clip in the last section then you saw how it was that Ryan was able to get the blend he was getting. I figured I would go ahead and give it a try myself.
Starting with darkening up the bottom I mixed a couple of different shades of gray to be ready to try this wet on wet blending technique.
Once I laid out the darker gray I came in with the lighter shade I had and it did actually help to get a better blend.
By applying the paint on a bit more thickly and moving quickly to add the next shade you can do some blending on the canvas in a way that helps get the variations of color needed to make it look more like a cloud.
When comparing this picture to my painting though I still have some work to do here. It’s getting closer but it is definitely not in a place where I’m satisfied with it.
Clouds are a bit tricky to get right and it clearly depends on your blending skills. Mine certainly need some improvement.
That is why we are doing this project though right? Every new project we do gives us an opportunity to identify our weaknesses.
Once we have them identified then we can work on exercising and improving them.
Add Rainy Mist with Light Brush Strokes
I have to admit at this point that this painting is still not going as good as I had hoped and that I will need to do many more of these in order to properly provide you with some quality techniques to use.
This is just terrible in my opinion but we march on! You can’t get better if you don’t complete your work.
Plus you never know if it all will come together in the last second.
In this step I tried to add more of the cloudy mist on the left side of the picture. It sort of looks like mist but sort of looks like falling rain
I did this with a flat brush and a bit of water in my paint mixture to help make it more transparent.
I also tried to work in some of the darker shadows towards the top of the cloud to help make the highlights pop better. This effect still needs some work.
Let’s keep going!
Blend In The Lighter Layers
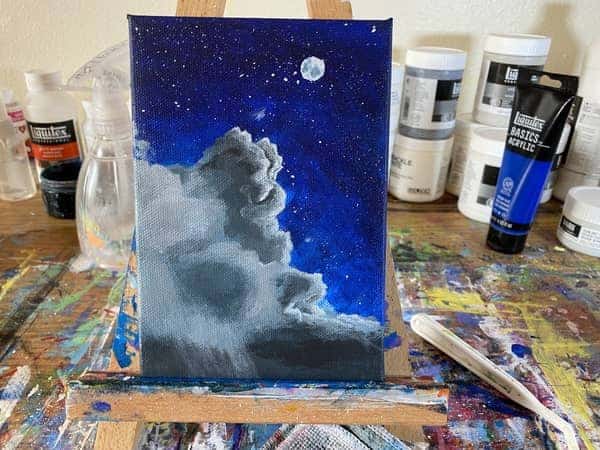
The wet on wet blending technique is good for getting those nice highlights with the harder edges. The parts of the cloud that are closest to the light and more condensed.
For the lighter more gray clouds and the falling rain in the foreground, I tried to apply a light layer of gray to get the more dispersed misty effect.
Using a brush with a straight edge apply the paint in small areas and then dry brush it out.
I also tried to add more to the slight amount of rain falling but don’t think the blends on either of these areas is right yet. I may have added too much water to my mix in an attempt to get that transparent effect.
At this point though I hope you have been able to pull through it like I have here and your painting is starting to look like a cloud!
I had to experiment with a lot of different blending techniques to try and get this to look at least somewhat close to the picture.
Let’s add some finishing touches and finish it out!
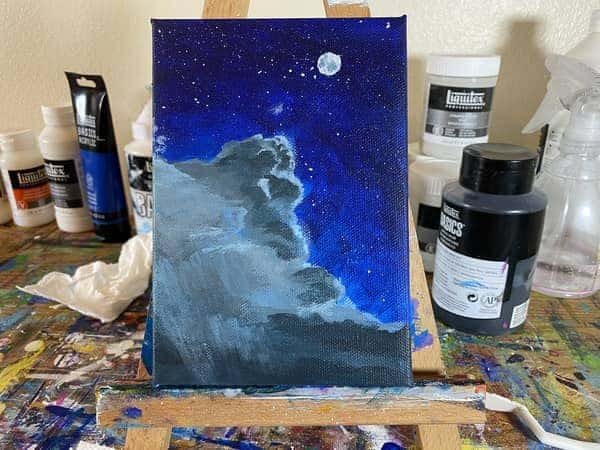
Add Finishing Details With Your Smallest Brushes
Using the wet on wet blending technique, continue to add more details as needed.
I had to darken the cloud that misty rain sits in front of to get a bit more of the shadowy effect we see in the picture.
Then I brought that dark gray up a bit to give a bit more depth to the misty clouds towards the top left.
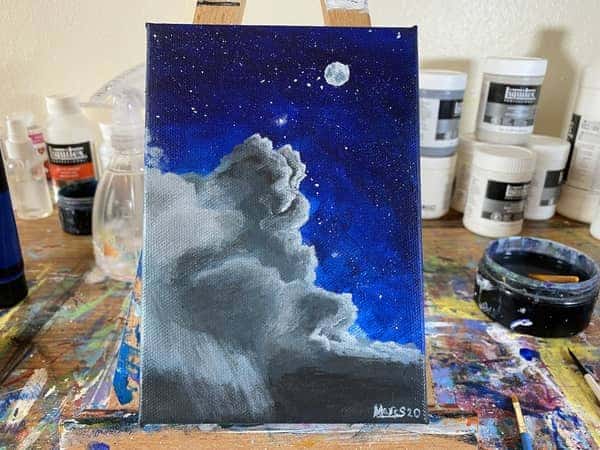
Work carefully at this point. Add a little bit at a time to ensure it’s going where you want it to go. I could have easily kept going and added another layer but it’s time to call it a day on this one and move on to the next one.
There definitely will be more cloud painting projects coming soon.
