

After doing acrylic pours for a bit you may begin to find yourself wanting to add more to it. I know I did. While the mixing and pouring processes are creative all by themselves the creativity doesn’t have to stop there!
An acrylic pour embellishment is anything you add to your pour painting that brings more detail and depth into it. These can be details painted on top of the naturally emerging patterns in the paint or it can be added materials like resin and rocks.
There are a lot of cool ways to take your acrylic pours to the next level with additional embellishments.
I think like with anything else in the art world your limited really only by your creativity.
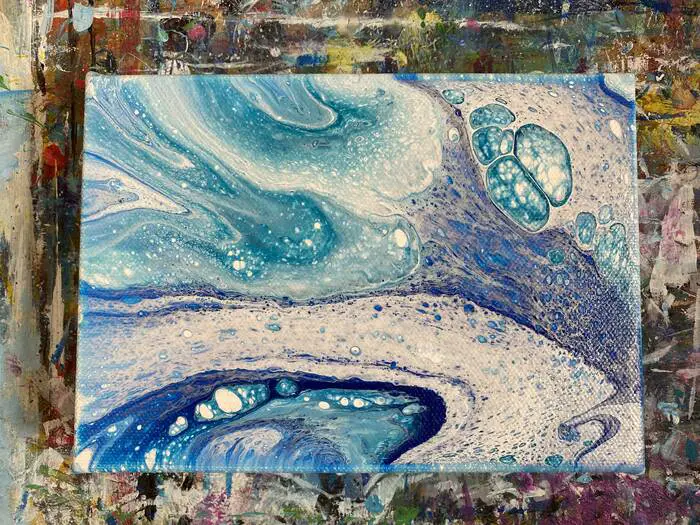
Of course, to properly explain this and provide you with original content I had to give it a try myself! Click here to check out the YouTube Short I made of the pour I’m going to use for my background.
This was just the pouring part of the project that will be used for the embellishment further down the page. Before we get to that let’s find some great examples to look at!
How Do You Embellish An Acrylic Pour Painting?
I decided that while I’m waiting for my pour to dry I could start studying what other artists have done to embellish their acrylic pours.
Ironically enough, the morning I decided to work on this and start writing it my friend David, The Left Brained Artist, just released his newest video on this topic.
I felt like his video was a really good example to include in this section as he shows a very simple and easy way to get started with embellishment of your pours.
Check out his channel and subscribe here!
We will work our way up through the various examples I found. Then after studying other artists we will try to come up with some ideas for the one I’m going to try it out on.
In the Left Brained Artist’s video, he shows an interesting approach where he likes to start off by putting a layer of plastic wrap over his painting that he can use to practice on. This way he can lay out his added embellishment onto his painting and get a good idea of how the painting will look with his added flare.
I think this is an excellent idea for those of us out there who may be a bit timid to try this out of fear of messing up our painting.
I do have another idea in mind for this that I will be trying down below when we start working on my attempt at embellishment.
While David provides an excellent example of something simply you can start with let’s look at some others!
This video by artist Sandra Lett shows a number of acrylic pours that she adds some extra flare to!
I’d say this is the next level of embellishments to work towards getting to.
She quite effectively plays off some of the emerging patterns in the pour to create something out of them. This seems to be a common element to really good embellishments.
This level of embellishment also takes some level of drawing skills. So if that isn’t something you’re working on yet and want to get to this level someday you will need to pick up the practice.
I suppose you could always give it a go anyway and learn by doing! This is personally one of my favorite ways to learn new things.
I just think you will get more satisfying results if you have some drawing under the belt already. You never know though. It is really fun to create something and surprise yourself with how good it turned out!
Sandra Lett is a great artist with tons of videos to check out. You can find more of her videos and subscribe to her channel by clicking here!
Now lets take a look at one of the best acrylic pour embellishers I have come across so far.
Elyse Fournier embellishes her acrylic pours with very elaborate and somewhat magical designs. From watching her work it seems almost as the design just emerges from the canvas and grows out of it.
She clearly plays off of the naturally occurring patterns in the pour. It’s possible that as she is making the pour she has some direction or some picture in mind she wants to work towards.
The above video is just the embellishing part of the process. She has a video before that showing the pouring part of the process and it looks like she is very intentional and deliberate with her pour.
Almost as if she had some idea of where she wanted it to go. I could be wrong about that perception though.
As pouring artists, if you have any experience with pouring yet, you probably already know how unpredictable a pour can be. You never really know exactly what you will end up with.
That said, she truly has a magical level of embellishments to add to her pours and is a prime example of where getting really good at acrylic pour embellishments can go.
Brainstorming Your Embellishment
After taking some time to look at what other artists are doing to embellish their acrylic pours I think I’m ready to give it a try myself!
Earlier when we were looking at The Left Brained Artist’s example of how to embellish an acrylic pour he showed us how he uses plastic wrap to help get an idea of where he wanted his painting to go.
This is an excellent idea and a great technique to use!
I’m going to do something similar but instead of plastic wrap, I’m going to work digitally. If you don’t have the ability to work digitally and for some reason don’t want to use the plastic wrap technique then you can always try to sketch out some ideas on paper.
Planning out additions to my canvas paintings digitally has become one of my many tools in my arsenal. I have a tendency to go to it when I am at a point in a painting where I like what I have, don’t know what else to add, and don’t want to do anything to ruin the painting.
I find it helps to experiment a little. It gets the creative juices flowing.
To do this, I prefer to use Procreate on my iPad. There are so many great reasons to have a digital option as an artist even if you don’t prefer working digitally most of the time. Painting planning is definitely one of them!
I highly recommend the use of Procreate but understand that iPads aren’t cheap. Well, the newest ones aren’t anyway.
I did write a page a while back on old iPads that work with the Procreate app. I need to update it to bring it current but if you’d like to check it out click here!
Some of the information on it is still valid and useful!
Anyways, let’s see what we can whip up! One of the other perks to working digitally is you can easily try out multiple variations of ideas you might be interested in using.
In this case, I was very drawn to doing something with the shape towards the bottom half of the canvas. I couldn’t help but see a dolphin there so I had to try it out!

Sometimes once you try one thing it becomes hard to see anything else. Plus, I really need to get this page and painting done today so I can move on to the next thing tomorrow!
If I were dissatisfied or wanted to allocate more time to this project I would do a few more variations just to see if I can find anything more interesting to do.
I like this enough though to give it a go for my first embellishment. I have a rule to always keep it as simple as possible when trying new things!
This way you can get that win and keep your momentum going. I can’t stress enough how important this is for continued advancement.
As inspired as I am by the works of the artists featured above, this is my first attempt at this. So I plan to keep this project simple and go for the easy win!
Now that I know what I want to do let’s bring the idea into our tangible reality.
How to Use Pour Art Embellishments
Once you have built up your confidence through some of the techniques in the previous section its time to bring your idea to life!
It can be a bit nerve wracking when you are trying something you have never tried.
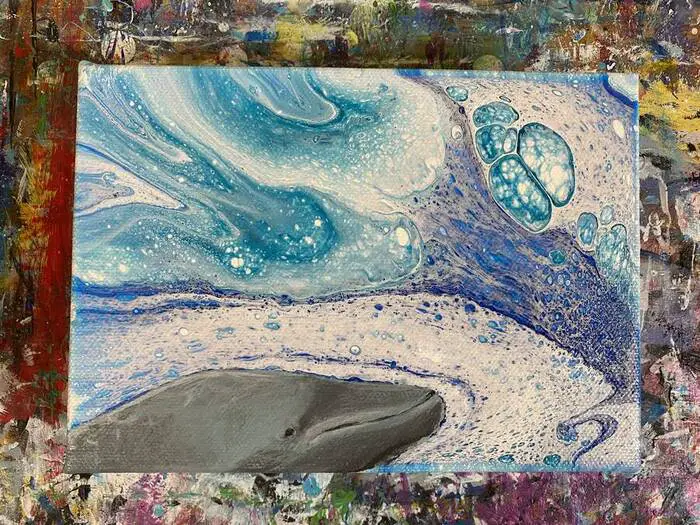
One of the drawbacks to embellishing an acrylic pour with something on top of it, like this dolphin, is that it becomes a bit more difficult to fix mistakes. You can’t really just paint over your addition with more acrylic pour that matches what you already have.
I made some time lapse YT Shorts of this whole process so you can see how I went about executing this painting. While I’m not totally satisfied with the results I’m going to cut myself some slack since this was my first embellishment attempt,
I don’t feel like I adequately captured the shape and form of the dolphin.
I’m not sure if this is due to a weakness in my ability to properly illustrate shape and form or if it is a result of trying to squeeze a dolphin out of a dolphin-shaped hole that isn’t quite the exact shape needed.
The results are adequate enough to demonstrate the concept though and hopefully stimulate some ideas for you to spice up your pours with too!
At the very least I hope this inspires you to give it a try and build up this skill.
I was still able to paint over my mistakes and dissatisfactions several times in the area that the “dolphin” occupies. So there is at least some level of forgiveness and ability to fix mistakes on the actual subject you’re painting.
I made several mistakes with shading and the placement of the dolphin’s features.
Here is the YT Shorts timelapse I made of the full process. You can see where I messed up a few times and painted over the mistakes.
All in all, while I think my dolphin looks more like a whale or a weird looking fish, this is just one way to add an embellishment to your acrylic pours.
There are obviously much better ways to go about getting good results and it of course takes more practice.
I just wanted to be totally transparent with my first one and show you all of my mistakes and my less than stellar final results.
You have to power through it and get them notches on your belt!
I undoubtedly will be trying to do more embellishments in the future so be sure to subscribe to the YT Channel by clicking here!
