
When you first start doing your acrylic pouring, there are a number of common problems you are likely to encounter with your pours.
I very quickly learned about cracking and crazing. The importance of getting your mixtures right and some of the things that can happen when you don’t.
Let us take a look at the many acrylic pour problems I have already encountered and see if we can figure out some ways to avoid them.
Ensure You Have a Level Surface
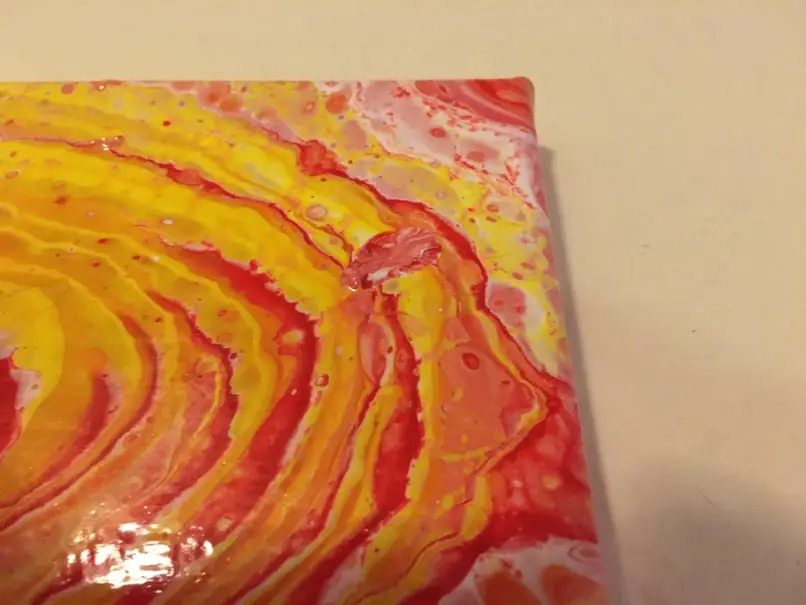
Many of my first pours started off looking great. Then as they dried I would come back later to find that all the paint has pooled to one side or another or flowed off the canvas at one specific point.
This causes an effect like what you see in this picture where you get a pinched side.
This is very clearly caused by not making sure my canvas was level. The right side was just a bit lower than it needed to be.
To solve this, you can easily download a level application for your smartphone and use that to help make sure the canvas is level. This is what I do.
Sometimes this can be awkward to do using your phone though so it may be better to just get a small level that you can rest easily on the canvas.


I probably will get something like one of these to add to my acrylic pouring tools soon. Plus it can then be used to make sure my paintings are level when I hang them.
Related Articles:
- How To Do an Acrylic Pour
- Acrylic Paint Pouring Techniques To Try
- Blue and Red don’t ALWAYS Make Purple! (How To Mix Purple)
- What Makes a Good Abstract Painting? The Principles of Art
- The Things You Can Wash Acrylic Paint Off Of (A Quick Guide)
What is crazing in acrylic pouring?
If you’ve been working your way through my content you may have seen me mention crazing a few times now. But… what is crazing when it comes to acrylic pouring?
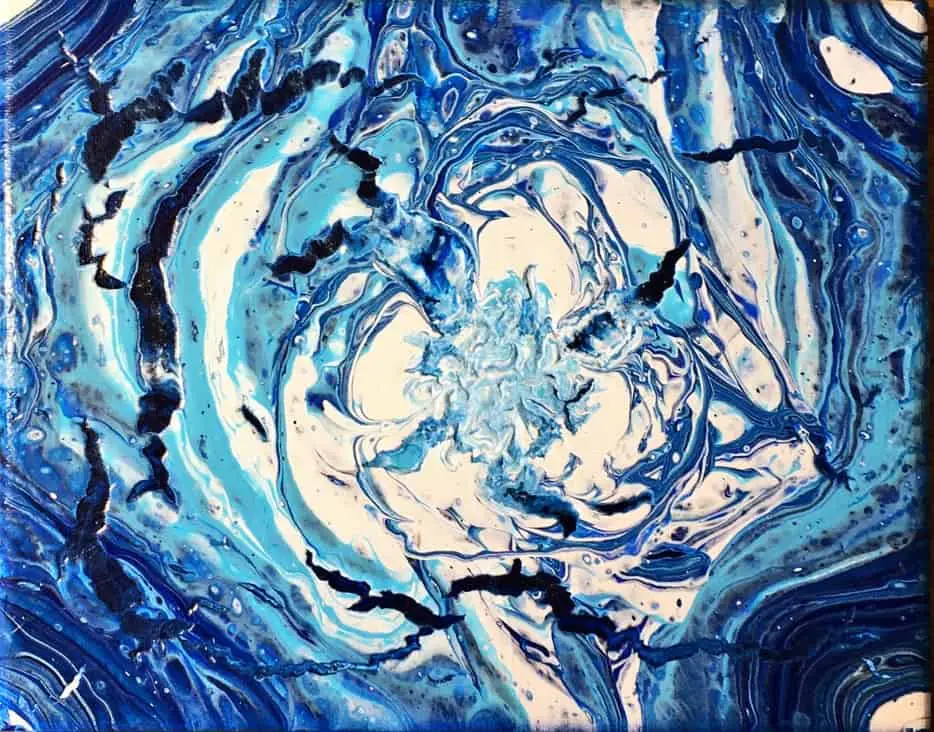
Here you see an example of crazing. It can be pretty disappointing to see what appears to be a great pour at first only to come back and check on it in the drying process and see these valleys and dips starting to form in the paint.
Crazing is these valley formations you get when the paint is drying and the polymers begin to break. This can be caused by a bad mix with your pouring medium or possibly even the medium itself.
It can also happen when the paint on top is drying faster than the paint underneath it. Causing the top layer to stretch and rip as the layers beneath begin to dry.
You can even get crazing when you’re glazing your piece. That’s fun to say, crazing when your glazing…
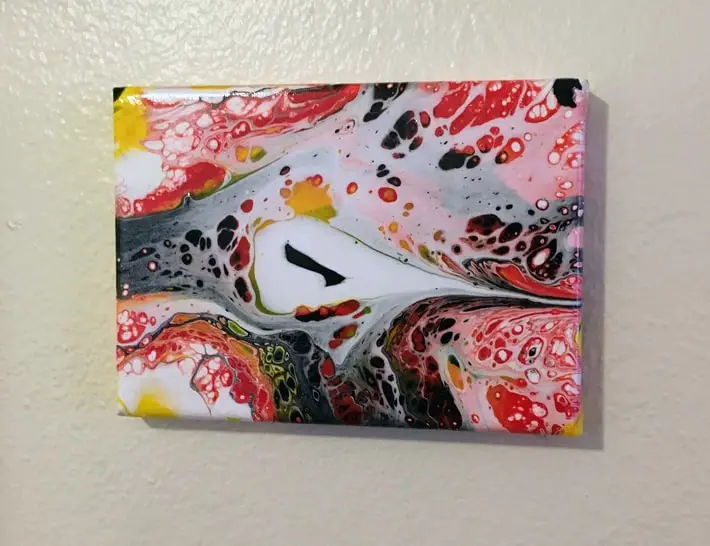
Anyways, in this piece here you can see numerous mistakes. This one is another example of how my canvas wasn’t level causing the paint to flow off the bottom right corner.
Despite that, I wanted to try adding a glaze to it. I figured since it was already messed up I would use it for my first attempt at glazing. Which turned out to be a good idea cause I got crazing in my glazing! Haha

It is a little difficult to see from this angle but there are all kinds of unwanted artifacts in this piece.
There is cracking AND crazing. My canvas was uneven. The way some of the paint runs together and stretches out indicates my mixtures weren’t right AND I didn’t use enough paint.
Ok, enough digression, back to crazing. Basically, if you are getting crazing from your pours just know they result from one of two things. Either your paint mixture was too thin or you had too much paint on the canvas.
So you will want to experiment with your mixtures and the amount of paint you’re leaving on the canvas as well.
Getting that Goldilocks factor in your paint mixtures and the amount of paint you use to cover your canvas is key.
When it comes to crazing when you’re glazing, I’m not sure yet but I think that may have been a result of using too much glaze at once. I haven’t quite mastered the finishing processes yet and will need to do a very thorough article on it.
The Problem With Using Thumb Tacks
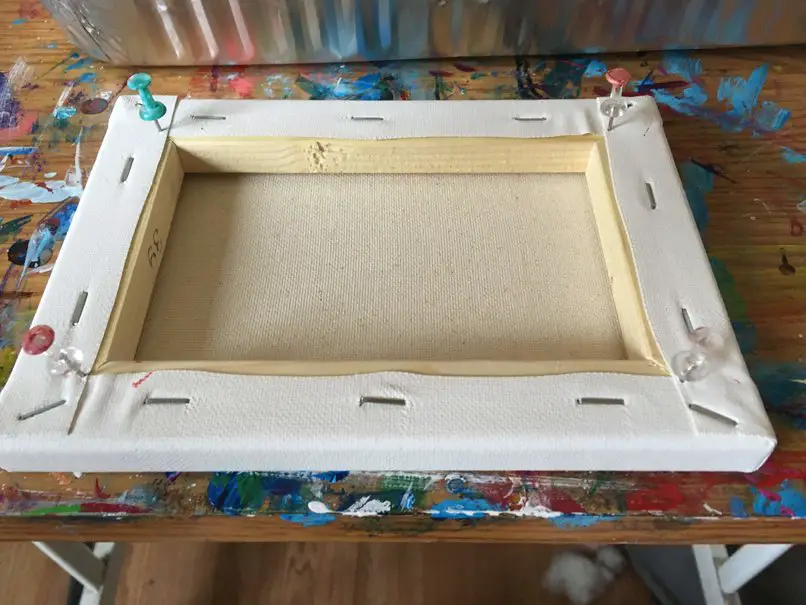
I saw one of the artists I follow on YouTube using tacks in the back of his framed canvas to keep his painting off the table. I thought “oh that’s a great idea, let me try that”.
There are a couple of problems with this method I have been having that you should be aware of before you go and try it too.
First off, it is hard to ensure they are all pushed in the same amount allowing the canvas to be level. You’ve now seen in the pictures above what sort of problems that can cause.
Not ideal or great if your goal is similar to mine in that you want to get high-quality results.
Second, I have had them fall out before while tipping the canvas back and forth and trying to let the paint spread across the canvas.

Needless to say, this causes a real problem at the moment on what to do with the canvas to ensure you don’t lose whatever is going on with the paint while you try to find something to prop it up on.
The last time this happened to me I had to pull all of the pins out while trying to maintain the cool effects I was getting with the paint. Then I had to set up another drip tray with medicine cups flipped upside down to place the canvas onto.
Luckily I was able to make it happen and not totally ruin the work.
Understanding Basic Color Theory
When you first start pouring you will want to look up some basic color theory.
Learn about complementary colors. Learn about analogous colors.
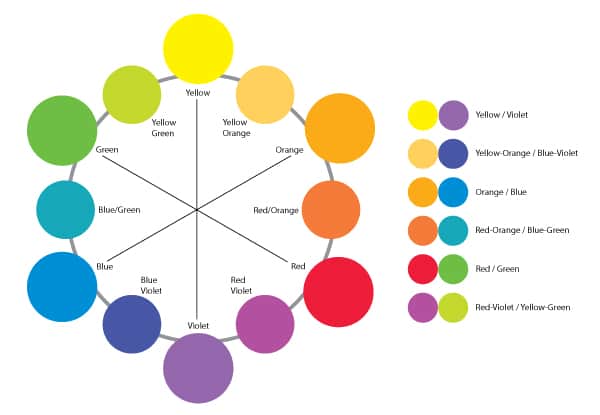
Here are a few examples of complementary colors to get you started.
This will help you choose good color combinations and avoid a muddy outcome.
Another great tool to use as well is the website Coolors.co. It is great for generating random color schemes that work well together.
While this tool is really most useful for my digital artists out there it can help give you some ideas of some colors to go with as well. Especially if you are having trouble deciding.
Let Your Pour Dry Completely
I have made the mistake of trying to move my painting before it is totally dry more than once.
This is a good way to end up with a fingerprint in the painting or something getting messed up.
After reading up on cracking and crazing I’m sure moving the painting before the paint is dry can contribute to potentially generating these unwanted effects.
It is also important to let your painting properly dry and cure before you apply any sort of finishing coat to it. This might be one reason why my glazing didn’t come out right on that painting above.
I may not have waited long enough for all of the potential moisture in the paint to evaporate completely.